Categories
Garden Articles Garden Blog Garden Tips

Demystifying Garden Fertilizers: NPK, Organic Options, and Application Tips

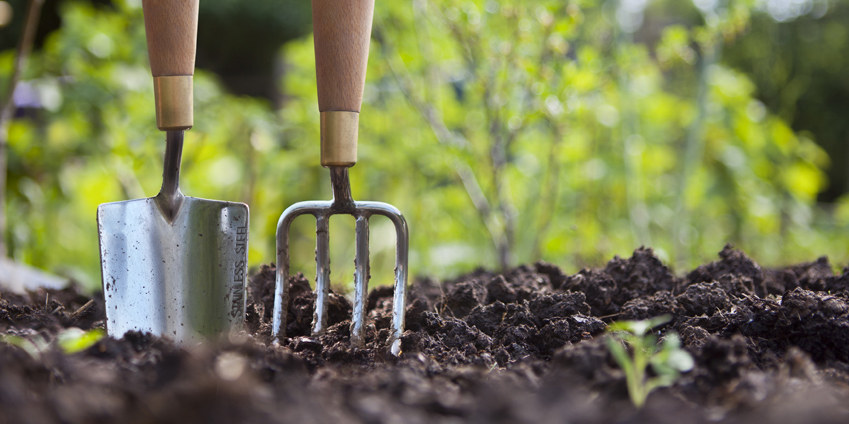
A thriving garden begins with healthy soil, and using the right fertilizer is essential for nourishing your plants, trees, and shrubs. With so many options on the market, it can be overwhelming to determine which fertilizer is best for your garden. In this blog post, we’ll explore the basics of garden fertilizers, including understanding the NPK ratio, the benefits of organic options, and tips for application.

Understanding the NPK Ratio

The NPK ratio on a fertilizer package refers to the percentage of Nitrogen (N), Phosphorus (P), and Potassium (K) contained in the product. These three nutrients are essential for plant growth and development:

  1. Nitrogen (N): Promotes healthy foliage and overall plant growth. It is particularly important for leafy vegetables and lawns.
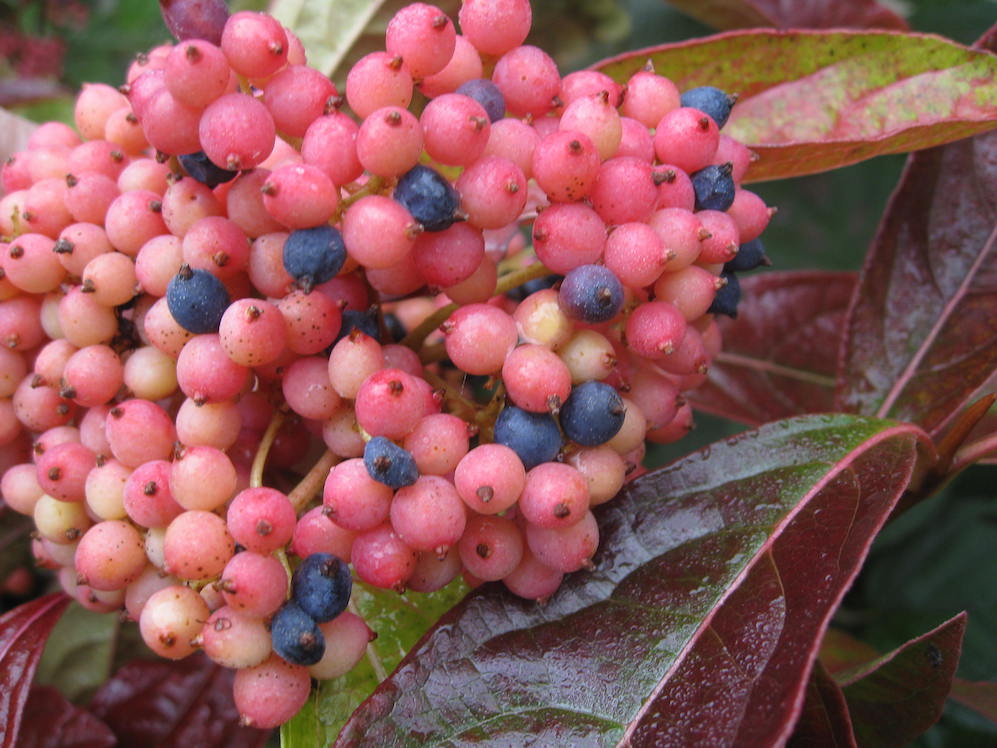
  2. Phosphorus (P): Supports strong root development and is crucial for flowering and fruiting plants.
  3. Potassium (K): Helps regulate water and nutrient movement within the plant and improves resistance to pests and diseases.

A balanced fertilizer, such as 10-10-10, contains equal parts of each nutrient, while a specialized fertilizer may have a higher percentage of one nutrient to target specific needs. For example, a 5-10-5 fertilizer would be higher in phosphorus to support flowering plants.

Organic Fertilizer Options

Organic fertilizers are derived from natural sources and can offer several benefits for your garden:

  1. Improved soil health: Organic fertilizers help build soil structure, increase water retention, and promote beneficial microbial activity.
  2. Environmentally friendly: They are typically slower to release nutrients, reducing the risk of nutrient runoff and water pollution.
  3. Enhanced plant health: Organic fertilizers provide a wide range of micronutrients, resulting in more robust and resilient plants.

Popular organic fertilizer options include:

  • Compost: Rich in nutrients and beneficial microorganisms, compost can be made from household and yard waste.
  • Aged manure: Well-rotted animal manure, such as from cows, horses, or chickens, can provide a nutrient-rich, organic option for your garden.
  • Bone meal and blood meal: These byproducts from the meat industry are high in phosphorus and nitrogen, respectively, and can be used to target specific nutrient needs.
  • Fish emulsion: A liquid fertilizer made from fish waste, which provides a balanced nutrient profile and is easy to apply.

When and How to Apply Fertilizers

The timing and method of fertilizer application depend on the type of plants you are growing and the specific needs of your garden. Here are some general guidelines:

  1. Annuals and perennials: Apply a balanced fertilizer in the spring, just as new growth begins. Repeat every 4-6 weeks during the growing season, following the recommended application rate on the product label.
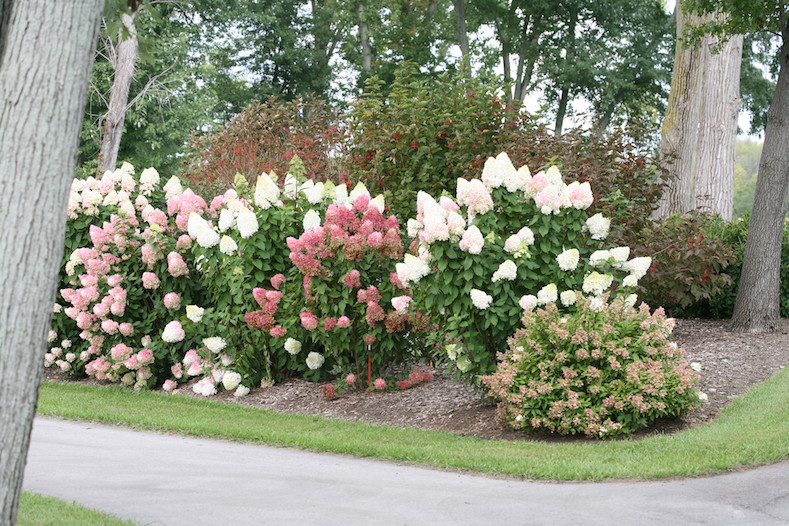
  2. Trees and shrubs: Fertilize in early spring, before new growth starts. Use a slow-release granular fertilizer, spreading it evenly under the canopy, and water thoroughly.
  3. Vegetable gardens: Apply a balanced fertilizer at planting time, mixing it into the soil. Side-dress with additional fertilizer as needed throughout the growing season, depending on the specific crop requirements.

Understanding garden fertilizers, including the NPK ratio and organic options, can help you provide the essential nutrients your plants, trees, and shrubs need to thrive. By selecting the right fertilizer for your garden and applying it properly, you’ll be well on your way to enjoying a lush, productive garden all season long.

Categories
Garden Articles Garden Blog Garden Tips

Kitchen Gardens 3 Ways

Creating a Versatile Kitchen Garden: Garden Beds, Raised Beds, and Containers.

Introduction

A kitchen garden is a fantastic way to grow your own fresh, delicious vegetables, herbs, and berries right in your backyard. With various gardening methods available, such as garden beds, raised beds, and containers, you can easily find the perfect approach to suit your space and needs. In this article, we’ll discuss how to start a kitchen garden using these methods, focusing on ideal vegetables, herbs, and berries for zone 6. We’ll also cover companion planting and the best times to plant.

Starting Your Kitchen Garden: Garden Beds, Raised Beds, and Containers

  1. Garden Beds

Traditional in-ground garden beds are a popular choice for growing a variety of vegetables and herbs. To begin, select a sunny spot with well-draining soil, and prepare the area by removing any weeds, rocks, or debris. For zone 6, vegetables like tomatoes, peppers, lettuce, spinach, and carrots will thrive, as well as herbs such as basil, parsley, and rosemary.

  1. Raised Beds

Raised beds offer a more controlled growing environment, making them an excellent option for gardeners with limited space or poor soil quality. Choose a location with ample sunlight, and build or purchase raised bed frames to create a well-defined growing area. Fill the beds with a mix of high-quality topsoil, compost, and aged manure. In zone 6, you can grow a variety of vegetables, such as kale, broccoli, beets, and peas, and herbs like oregano, thyme, and mint.

  1. Containers

Container gardening is perfect for those with limited space, such as balconies, patios, or small yards. Choose containers with drainage holes and fill them with a high-quality potting mix. Opt for compact vegetable varieties like cherry tomatoes, dwarf peppers, and bush beans, and herbs like chives, cilantro, and sage. Make sure your containers are placed in a sunny location and monitor them closely for proper watering.

Companion Planting and Berries

Companion planting is the practice of growing specific plants together to enhance growth, deter pests, or improve flavor. Some effective companion plantings for your kitchen garden include:

  • Tomatoes with basil, parsley, or marigolds
  • Carrots with chives, rosemary, or sage
  • Lettuce with spinach, radishes, or dill
  • Peppers with onions, basil, or oregano

Incorporating berries into your kitchen garden adds a delightful pop of color and an additional source of homegrown fruit. In zone 6, consider growing:

  • Strawberries: Plant in a sunny spot, either in the ground or in containers. They make excellent companions for spinach and lettuce.
  • Raspberries: Choose a sunny location with well-draining soil, and provide a trellis or support for the canes. Good companions include marigolds, chives, and garlic.
  • Blueberries: Plant in acidic, well-draining soil, in full sun or partial shade. They can be grown in containers or raised beds and pair well with thyme, sage, or mint.

Planting Times for Zone 6 Gardens

Zone 6 has a relatively short growing season, with the last frost typically occurring in mid-to-late April and the first frost in mid-to-late October. Use these guidelines for planting your kitchen garden:

  • Cool-season vegetables like peas, lettuce, and spinach can be sown outdoors in early to mid-spring, about 4-6 weeks before the last frost.
  • Warm-season vegetables such as tomatoes, peppers, and beans should be planted after the last frost date, when the soil has warmed up
Categories
Garden Articles Garden Blog Garden Tips

Pruning and Fertilizing Hydrangea macrophylla for Stunning Blooms

Introduction

Hydrangea macrophylla, commonly known as bigleaf hydrangea, is a popular garden staple beloved for its large, showy blooms that grace gardens from late spring through summer. To keep your hydrangeas healthy and thriving, it’s essential to understand when and how to prune them, as well as the optimal times and methods for fertilizing. In this blog post, we’ll explore these topics to help you maintain your hydrangeas and achieve those gorgeous blooms every season.

When and How to Prune Hydrangea macrophylla

The first thing to know about pruning Hydrangea macrophylla is that the timing depends on the type of hydrangea you have. There are two main categories: mopheads (with rounded flower clusters) and lacecaps (with flattened flower clusters). Both types bloom on old wood, meaning the flower buds form on stems that grew the previous year.

  1. Pruning Mophead Hydrangeas

For mophead hydrangeas, the best time to prune is in late summer, right after the flowers have finished blooming. This allows the plant enough time to develop new growth and set buds for the following year’s blooms. Follow these steps to prune your mophead hydrangeas:

a. Remove any dead or damaged stems at their base. b. Cut back one-third of the oldest stems to the ground to encourage new growth. c. Prune the remaining stems just above the top set of healthy buds to shape the plant and control its size.

  1. Pruning Lacecap Hydrangeas

Lacecap hydrangeas require a slightly different pruning technique. Prune these in late winter or early spring, just as new growth begins to emerge. Follow these steps:

a. Remove any dead or damaged stems at their base. b. Cut back the previous year’s growth to the first or second pair of healthy buds. c. Lightly trim the remaining stems to shape the plant.

When and How to Fertilize Hydrangea macrophylla

Feeding your hydrangeas at the right time and with the right fertilizer can significantly impact their health and blooming potential. Hydrangeas generally need to be fertilized once or twice a year, depending on your soil quality.

  1. Timing

The best time to fertilize hydrangeas is in early spring, just as they begin to show new growth. If you live in a region with a long growing season, you can also apply a second feeding in mid-summer to boost growth and blooming.

  1. Type of Fertilizer

Choose a slow-release granular fertilizer with a balanced formula, such as 10-10-10 (indicating equal parts nitrogen, phosphorus, and potassium). This will provide your hydrangeas with the essential nutrients they need for optimal growth and flowering.

If you want to influence the color of your hydrangea blooms, you can manipulate the soil pH. For blue flowers, apply a fertilizer high in potassium and low in phosphorus, or use a soil acidifier to lower the pH. For pink flowers, use a fertilizer high in phosphorus and low in potassium, or add lime to raise the soil pH.

Endless Summer hydrangeas are a unique variety of Hydrangea macrophylla that are well-loved for their ability to produce blooms on both old and new wood. This characteristic makes them more forgiving when it comes to pruning, as even if you accidentally remove some buds, the plant can still produce new flowers on the current season’s growth.

While the pruning process for Endless Summer hydrangeas is similar to that of other bigleaf hydrangeas, there are a few adjustments to keep in mind.

  1. Timing: The ideal time to prune Endless Summer hydrangeas is in late winter or early spring, as new growth begins to emerge. This allows you to assess any winter damage and make more informed decisions about which stems to remove. You may also lightly prune after the first flush of blooms to encourage a second wave of flowers.
  2. Technique: Follow these steps when pruning your Endless Summer hydrangeas:

a. Remove any dead or damaged stems at their base. These can be identified by their dry, brittle, or discolored appearance.

b. If your plant is older or overgrown, cut back about one-third of the oldest stems to the ground to promote new growth and rejuvenate the plant.

c. For the remaining stems, trim them back to a healthy set of buds. Be cautious not to remove too many buds, as this may reduce the number of flowers produced in the coming season.

Remember that Endless Summer hydrangeas do not require heavy pruning, and it’s better to err on the side of caution. The goal is to maintain the plant’s overall health and encourage an abundance of blooms throughout the season.

Categories
Garden Articles Garden Blog Garden Tips

Preparing Your Roses For Winter

As winter approaches we turn our attention to preparing the garden for slumber. Beds are mulched, perennials are cut back, tender bulbs are lifted and stored, and we prepare to protect our roses from winter’s chill. The timing of your winter rose care will be determined by your area, however, a helpful reminder is to use Thanksgiving as a deadline for zone 5, earlier for zone 4, and later for zones 6 and up.

Step 1. When cutting back your roses bear in mind that roses die from the top down. When pruning your roses in late fall or early winter, plan on cutting back to about 2 1/2 to 3 feet. This will give you some latitude when it comes to winter kill. This is a general rule that can be applied to hybrid teas and most floribunda roses. Climbers and ramblers should not be cut back to this extreme, but rather tied back to trellis or fencing in order to keep the canes from snapping in the wind.

Step 2. When pruning, take care by using gloves. Using sharpened, clean by-pass pruners make a cut at an angle. General removal of deadwood or crossed branches can be accomplished at this time. Strip and remove all remaining foliage.

Step 3. Many will recommend removing all but the strongest four to five canes. This is a good technique for hybrid teas, especially those used for cut flowers. This is a judgment call. Your pruning will depend on the type of bush you are looking to create. When pruning we will often recommend filling your cuts with either a clear nail polish or even white glue. This serves to seal the cut and prevent pests such as cane borer bees from nesting in your roses. These insects are dormant in the winter and the cuts will generally seal themselves over time.

Step 4. Winter damage to rose bushes most often occurs when severe winds, or snow loads, rock the plant or shift it so it is loosened from the soil. This can expose roots which then dehydrate and produce severe damage to the plant. For this reason we encourage you to stake your pruned rose. This will help stabilize your plant and prevent damage from freezing and thawing. Place the stake while you can still drive it into the soil. After the ground freezes it will help anchor the plant.

Step 5. After the ground does freeze (in cold weather climates) apply some method of providing a retainer for mulch, soil, or shredded leaves. This can be a rose cone, peach basket, or in this case a rose collar. Protect the bud-union by applying 10-12 inches of organic material. Most areas can winter protect with soil from the garden. Take care when using rose cones or baskets. A plastic pail will often “cook” a rose bush, especially one situated in a southern exposure. In colder climates this original mounding up can be supplemented with pine boughs or chips. Take care to mulch in plants after the ground has frozen, for done too early can only provide a safe winter habitat for field mice or rodents who will then feast on the roots over the winter.

Step 6. Spring removal. Generally your roses can be uncovered around the first week of April. If you are in a warmer climate, clean them up earlier. An adage was to uncover your roses just before you prune your forsythia (which is just after the bloom fades). At this time you can remove most of the soil by hand and then using full water pressure, remove soil from the crown by spraying it with a strong spray. When the buds break in the warm weather apply a fungicide and begin feeding in May.

Categories
Garden Articles Garden Blog Garden Tips

Houseplant of the Month: Norfolk Island Pine

Norfolk Island Pine Plant Features

An easy-care houseplant, Norfolk Island pine is a festive holiday plant you can enjoy all year long! During the holidays, its needled branches look right at home decorated as a Christmas tree. After the holidays pass, remove the decorations and enjoy its classic look (and air-purifying powers) anywhere in your home.

Though it’s called Norfolk Island pine, it’s not a pine at all. Rather, this stately tree is a tropical plant native to the South Pacific. Indoors, it’s relatively slow-growing, but over the course of several years, this adorable little plant can grow to 6 feet tall or more.

Small, young Norfolk Island pines are perfect for decorating mantles, tabletops, and desks. As this long-lived houseplant grows, it’s becomes better situated as a floor plant and can be used to fill bright corners, flank furniture (such as entertainment centers), or stand alone as a stunning focal point.

If you want to encourage faster growth from your Norfolk Island pine, move it outdoors to a shaded or partly shaded spot during the summer. Because it’s a tropical tree, wait until all danger of frost has passed before moving it out, and bring it back in before the first frost in fall.

Norfolk Island Pine Growing Instructions

Grow Norfolk Island pine in a medium to bright spot in your home. The less light it gets, the slower it will grow. But avoid very low-light situations. If it doesn’t get enough light (natural or artificial), your Norfolk Island pine will be weak, spindly, and unattractive.

Water it enough to keep the soil moist, but not wet. The roots will rot if they stand in water. If the plant stays too dry, the tips of its branches will turn brown and crispy. Fertilize Norfolk Island pine once or twice during spring and summer to keep it growing well. You can fertilize more often if you want your plant to grow faster! 
Note: After the holidays, take your Norfolk Island pine’s pot out of the festive foil pot cover (if it has one). Pot covers trap excess moisture around the roots and can cause your plant to suffer rot if it stays too moist.

If you wish to prune your Norfolk Island pine, you can do so at any time of the year.

Like most houseplants, Norfolk Island pine benefits from being repotted every couple of years.

Thanks to – http://www.costafarms.com/plants/norfolk-island-pine

Categories
Garden Articles Garden Blog Garden Tips

Is there still time to plant?

Categories
Garden Articles Garden Blog Garden Tips

Balsam vs. Fraser Fir? How to choose.

Fa la la la! It’s the most wonderful time of the year–and our favorite part of the season! It’s time to head out with your family and wander amongst all the beautiful types of trees, looking for just the right one. As you’re searching, do the fresh test! Run your fingers along the needles, grab the branches and bounce the tree a little. If many needles fall off, the tree was cut long ago and has not gotten enough water, so find another! Also, the hunt for the perfect tree will go much smoother if you already know the type of tree you want.

Picking out a perfect tree isn’t all about looks—the tree’s scent, strength of branches, and needle retention all matter, too. So before you head to the tree farm or lot to select yours, lets compare the two most popular Christmas trees.

Balsam Fir –  3/4″ to 1 and 1/2″ short, flat, long lasting needles that are rounded at the tip; nice, dark green color with silvery cast and fragrant. These needles are 3/4 – 1 and 1/2 in. in length and last a very long time. This is the traditional Christmas tree that most Americans grew up with. This tree has a dark-green appearance and retains its pleasing fragrance throughout the Christmas season. 

Fraser Fir – The Fraser fir may be the perfect holiday tree. Its attractive 1-inch needles are silvery-green and soft to the touch. Because there is space between the branches, the Fraser is easier to decorate than some trees. The firm branches hold heavier ornaments. The trees grow to almost perfect shapes, and as long as the cut tree is kept properly watered, the Frasier fir has excellent needle retention.

Everyone has their favorite. We hope you have fun selecting this year’s perfect tree!

Categories
Garden Articles Garden Blog Garden Tips News and Tips

Why Plant in Fall?

Many folks are surprised to learn that autumn runs a close second to spring as an ideal planting time, but it’s true: cool temperatures, reliable rainfall, and short, bright days help plants make a quick and easy transition to your landscape. Despite the cold weather lurking around the corner, the entire first half of autumn (and then some) provides ample opportunity for plants to grow roots and get off to a good start in their new home. Before you run off to the garden center, though, there are a few things you should know to ensure success with fall planting:

– You can plant up to 6 weeks before your ground freezes. Once the ground is frozen, root growth will cease almost entirely until spring, and that six week window gives the plant time to get established enough to withstand cold and snow. The date that your ground actually freezes varies from year to year, of course, and some areas won’t have frozen ground at all. If you’re unsure, mid-November is a safe planting deadline for nearly everyone.

– Get everything in the ground before the ground freezes. If you still have plants in their nursery pots, get them in the ground before winter, no matter how late it has gotten. The plants will be much happier and better protected in the ground than in their thin plastic pots, so even if it’s getting quite late in the season, just plant them where you can. You can always move them come spring if you change your mind.

– Provide supplemental water when needed. Autumn weather can be quite cool and rainy, but that doesn’t mean that new plantings should be ignored, particularly if weather has been dry and/or windy. Water all plants thoroughly after planting, and continue to water them as needed until the ground freezes.

– Mulch. Just as you pile on blankets and quilts when the temperatures dip, mulch acts as insulation for plants. Mulch also creates the ideal environment for vigorous root growth, which helps new plantings get off to a good start. While even established plants benefit from a nice layer of mulch, newly planted specimens especially appreciate the protection it offers from the challenges of winter.

– Know what to expect. You won’t see much top growth emerge on fall-planted shrubs, but this is actually a good thing: any new growth that the plant produces now will be too soft to survive the impending cold anyway. Autumn planting is all about giving the plant a chance to put on root growth, which continues until temperatures average about 48°F/9°C. Plantings will be raring to go come spring thanks to the roots they create in fall.

There are also a few things to avoid:

– Avoid planting evergreens in mid-late fall. Because they keep their foliage all winter, they are more susceptible to drying out when the soil is frozen and the winds are blowing. Having several months (rather than several weeks) to develop a sizeable root system better prepares them to face these challenges. This is especially important for broadleaf evergreens like holly, rhododendron, and boxwood, as their large leaves are far more likely to get windburned and drought-stressed than conifers with needle or scale-like foliage.

– Avoid planting varieties that typically get winter damage in your climate. Certain plants get a bit of winter damage every year, no matter what – butterfly bush, caryopteris, and big-leaf hydrangea are some common examples. If you’ve got a shrub in your yard that you prune each spring to remove dead, winter-damaged stems, similar varieties would be better planted in spring than fall.

– Avoid planting anything that’s pushing it in terms of hardiness. Hardiness zones are a guideline, not an absolute, and lots of gardeners happily experiment with them. If you’d like to try something that’s perhaps not entirely hardy in your area, it’s far better to plant it in spring so it gets the whole season to grow roots instead of just a few weeks. The more roots it has, the better-equipped it is to survive winter.

Bonus tip: All of these guidelines apply to transplanting as well as new plantings, so if you’ve been considering moving something that’s already a part of your landscape, fall is a great time to do it.

One last thing before you grab that shovel – take a look at our planting tutorial to ensure you’re planting like the pros. Enjoy the season!

Categories
Garden Articles Garden Blog Garden Tips News and Tips

Add These Fall Favorites

It’s officially Autumn!

Fall is a glorious time of year. The countryside is virtually exploding with oranges, reds, golds and yellows. This is a great time of the year to enjoy the out-of-doors. It is also a great time for fall gardens as autumn mums and perennials finish the season with a flourish.

Most spring planted annuals get a bit ragged about now, having survived through the heat, dry conditions and pests of the summer. This is a good time to freshen up your gardens by introducing some proven winners to your fall landscape. Coincidentally, you’ll probably be around to enjoy your fall garden more than you mid-summer plantings. The weather is more temperate, vacations are over with and kids are back in school.

With that it mind here are a few suggestions that are sure to please. Most of these plants will have strong seasonal interest well into December-and ornamental grasses are great all throughout the winter!

Fall Favorites: Ornamental Grasses-Grasses are a terrific way to add drama to your landscape. Their texture is a perfect foil to Rudbeckias, Sedum or hardy Chrysanthemums. They are extremely easy to grow, durable and can be used in a variety of landscape situations. They are also very attractive when used in containers. Ornamental grasses can range in height from under one foot (Festuca cinerea ‘Elijah Blue’) to well over six feet (Miscanthus sinesis ‘Silver Grass’). Many varieties of the Pennisetum family are gaining in popularity, including alopecuroides, with its enormous tassels through fall and winter and a dwarf fountain grass called ‘Hamelin’. Most varieties send out dramatic spikes of feathery plumes during late summer and early fall. These seed heads add interest to an otherwise stark winter landscape.

Ornamental Kale-Flowering kale and cabbages are fast becoming one of the more popular additions to the fall border. And for good reason…ornamental kale offers dramatic colors and shapes not commonly available in the fall. Brilliant pinks, purples and creamy whites add intrigue whether planted in the landscape or used in containers to accent mums and grasses.

Their fabulous colors are not flowers, but rather rosettes of central leaves. Flowering Kales have fringed or serrated leaves that actually gain in color intensity as the weather turns colder. They literally bloom into the winter months! Their vibrant displays will last until the winter temps reach the teens.

Fall Pansies (Violas)-This is a great way to extend your color into November and beyond. While most mums have gone by, these guys, with proper maintenance, will flower their heads off. Plant them in drifts, in pots or even tuck a few in to spruce up a tired hanging basket. These cheery faces do especially well with the warm ground temps and cool nights of autumn. They usually will flower through the first couple of hard frosts. Hardier varieties even winter over and provide unexpected delights the following spring. Imagine their deep purples set off against the brilliant pinks of ornamental kales. The nice thing about it is it will look great whether planted in the landscape or potted up for the front door!

Well, those are but a few of many great ways to liven up your fall landscapes. Sedum, hardy perennial Hibiscus and Asters are other opportunities. Stop by with any questions. We are always here to help. Fall is a beautiful time, and after all, Fall is for Planting!

Categories
Garden Articles Garden Blog Garden Tips News and Tips

Fall Display Decorating Ideas